Inductive sensors play a crucial role in modern automation systems, enabling accurate and non-contact detection of metallic objects. Whether you’re an engineer, technician, or maintenance personnel, understanding how to test an inductive sensor is essential for ensuring system stability and minimizing downtime.
In this blog, we’ll explore:
-
What an inductive sensor is,
-
Its importance in industrial automation,
-
Why testing matters,
-
And 6 reliable methods to test your inductive proximity sensor—especially using a multimeter.
What is an inductive Sensor?
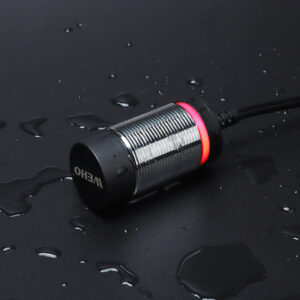
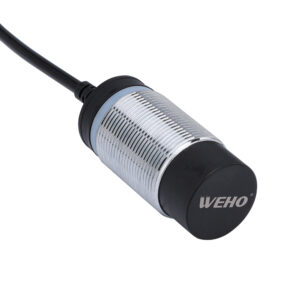
An inductive sensor, also known as an inductive proximity sensor, is a non-contact device used to detect the presence or absence of metallic objects. It operates based on the principle of electromagnetic induction. When a metal object enters the sensor’s electromagnetic field, it disrupts the field and triggers a change in the sensor’s output.
These sensors are widely used in industrial settings due to their robustness, speed, and ability to function in harsh environments with dust, oil, or moisture.
Importance of Inductive Sensors in Industrial Automation

In the world of industrial automation, inductive sensors serve as the eyes of automated machinery. They’re used for:
-
Position detection of machine components
-
Counting metal objects on production lines
-
Feedback systems in CNC machines
-
Safety interlocks and limit switches
Because they’re vital for operational accuracy, any failure in an inductive sensor can lead to costly production delays. This is why routine testing and maintenance are critical.
Importance of Testing Inductive Sensors
Understanding how to test sensors, especially inductive proximity sensors, is not just about troubleshooting. It ensures:
-
Consistent and accurate signal output
-
Early detection of wear or malfunction
-
Prevention of machine downtime
-
Longer lifespan of your sensor and related equipment
Whether you’re installing a new sensor or maintaining an existing one, knowing how to test an inductive sensor is a valuable skill.
How to Check Inductive Proximity Sensor with Multimeter: 6 Methods
Now let’s explore 6 practical methods to check an inductive sensor, starting with the most accessible tool—your digital multimeter.
| Method | How to Check | What to See |
|---|---|---|
| Visual Inspection | Look at sensor and wires | Damage, dirt, loose wires |
| Multimeter Test | Measure voltage when powered | Voltage changes with metal |
| Relay Test | Connect sensor to relay | Relay clicks when metal near |
| Oscilloscope Test | Check signal on oscilloscope | Clear on/off signal |
| Simulation Test | Use metal target to trigger sensor | Sensor switches correctly |
| Dedicated Tester | Use special sensor tester tool | LED shows sensor status |
Visual Inspection
Before grabbing your tools, begin with a visual inspection. Look for:
-
Physical damage or cracks in the housing
-
Corrosion or dirt on the sensor face
-
Loose or frayed wires
-
Proper mounting and alignment
Sometimes the issue lies in something as simple as a bent bracket or dirty sensor surface.
Test with a Multimeter

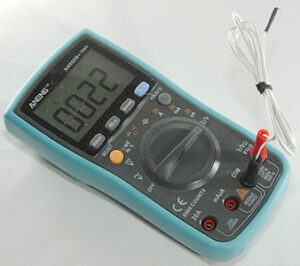
Wondering how to check inductive proximity sensor with multimeter? Here’s how:
-
Set your multimeter to DC voltage mode.
-
Power on the sensor using its standard voltage (usually 10–30V DC).
-
Place the black probe on the negative terminal and the red probe on the sensor’s output wire.
-
Place a metal object in front of the sensor.
You should see a voltage change (usually from 0V to around 24V or vice versa), depending on whether the sensor is NPN or PNP. If there’s no voltage shift, the sensor may be defective.
This is one of the easiest and most effective ways for anyone wondering how to test a sensor in the field.
Test with an Intermediate Relay
Another method is to connect the sensor to an intermediate relay and observe whether the relay toggles when a metal object is brought near the sensor.
This test is useful for:
-
Confirming switching behavior
-
Verifying output signal under working load
-
Diagnosing intermittent faults
If the relay fails to engage or disengage, it indicates a possible issue with the sensor’s output stage.
Use an Oscilloscope
For advanced diagnostics, an oscilloscope provides precise insight into signal integrity.
-
Connect the oscilloscope probe to the sensor’s output
-
Move a metal target in and out of the sensing range
You should observe clear high/low transitions or waveform changes. If the signal is noisy, delayed, or missing, the sensor might be failing internally.
Simulate Sensor Operation
Simulating the sensor’s working conditions allows for functional testing:
-
Use a test jig or actual installation setup
-
Introduce metal targets at controlled intervals
-
Monitor the sensor output with a controller or indicator
This method is ideal when testing multiple sensors in batch installations.
Use a Dedicated Tester
Finally, some maintenance teams use dedicated inductive sensor testers, which provide real-time feedback on sensor behavior.
Advantages:
-
Quick plug-and-play testing
-
Built-in LED indicators
-
Polarity and range detection
These tools are useful for rapid field checks and initial commissioning.
Maintenance Tips for Inductive Sensors
To extend the lifespan of your sensors, follow these maintenance best practices:
-
Clean the sensor face regularly to remove dust and metal shavings
-
Avoid physical impacts or exposure to high temperatures
-
Check wiring insulation and secure connections
-
Calibrate sensor positions if machinery is relocated or modified
-
Replace aging sensors before they fail completely
Regular checks and scheduled maintenance reduce the need for urgent sensor replacements and keep your operations running smoothly.
Conclusion
Inductive proximity sensors are indispensable in modern industrial environments. Knowing how to test an inductive sensor—from simple multimeter checks to oscilloscope readings—empowers you to ensure system reliability and prevent unexpected breakdowns.
Whether you’re asking how to check inductive proximity sensor with multimeter, looking to test sensors with professional tools, or just doing a routine check in sensor status, these six methods will guide you toward accurate diagnostics.
Keep this guide handy for your next maintenance cycle—and ensure your automation stays precise, responsive, and reliable.


